How to Determine Garage Door Track Radius
The track radius is the size of the curve where the vertical track turns into the horizontal track. One quick look and one measurement is all it takes.
Step 1: Know the Three Configurations
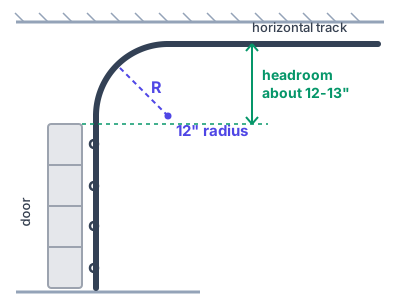
12" Radius
Tighter curve. Common where ceiling space is limited; needs about 12-13" of headroom above the door.
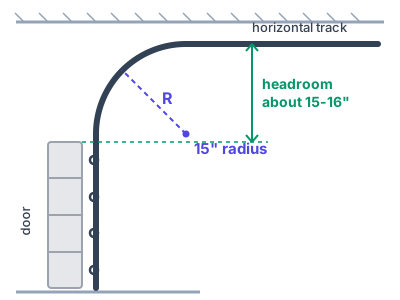
15" Radius
The most common residential track. Gradual curve; needs about 15-16" of headroom above the door.
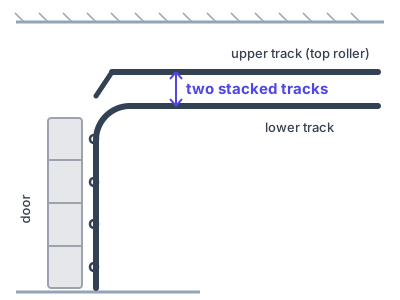
Low Headroom (0)
Two stacked horizontal tracks and only a small curve. Used when there is very little space above the door.
Step 2: Measure the Curve
- Look above the door with it closed. If you see two horizontal tracks stacked on top of each other, you have Low Headroom - done, pick 0.
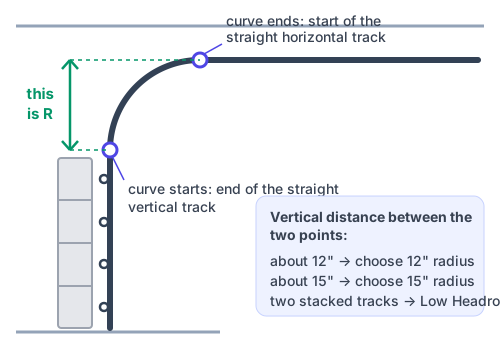
- Otherwise, find where the straight vertical track ends and the curve begins.
- Find where the curve ends and the straight horizontal track begins.
- Measure the vertical distance between those two points.
- About 12 inches means 12" radius; about 15 inches means 15" radius.
Shortcut: measure from the top of the closed door up to the horizontal track. Roughly 12-13" of headroom means a 12" radius; roughly 15-16" means a 15" radius.
Track Clearance Reference
Low Headroom (0-3")
- Ceiling height: door height + 6" (front mount)
- Ceiling height: door height + 2" (rear mount)
- Back room: door height + 18"
12" Radius
- Ceiling height: door height + 12"
- Side room: 4" minimum each side
- Back room: door height + 18"
15" Radius
- Ceiling height: door height + 15"
- Side room: 4.5" minimum each side
- Back room: door height + 20"
Done? Back to the Calculator
Pick your radius in the calculator and you are one step closer to the right spring.